2004 Overhaul and outfitting Thread

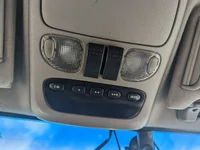
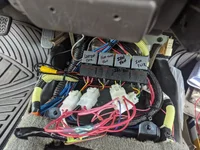
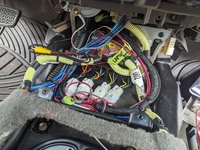
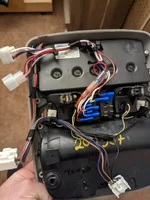
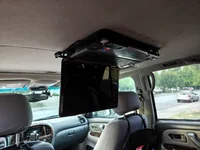
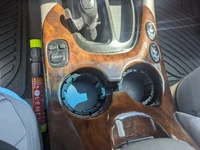
Since the sunroof no longer worked I opted to replace the control switches with some Carling style switches. They just barely fit in the overhead console. Driver side switch is wired to control a relay under the center console that turns on and off the power switch for the laptop inverter and associated ventilation fans. There is three positions on the switch so I wired one position for OFF, one position for an ignition relay to turn on and off with the ignition key and one position to run full time so the kids could use the laptop when parked / engine off using the aux battery. I've been adding electrical connectors to each harness because I get annoyed when working on other peoples vehicles and every wire is ran wires direct to switch terminals, relay or component as it makes working on them later very difficult and often confusing.


PXL_20260228_194526908.webpPXL_20260228_194543786.webpPXL_20260228_194828456.webpPXL_20260308_025822603.webpIMG20260711200116.webp
 
Last edited:
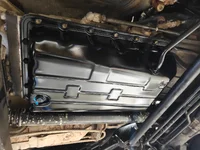
Did the transmission pan and filter. Factory silicone was holding the pan on so I doubt it had ever been done which IMO is pretty impressive for 260k mi. Cleaned the pan up and re installed.

IMG20260531135225.webp

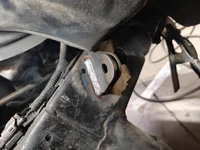
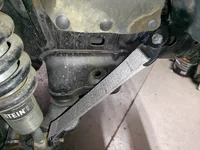
Was having an issue with the to long front shocks where when I went over a dip on the freeway, the front suspension maxed out and the CV shafts would bind and make a horrible noise. I installed a set of limiter straps on the front lower control arms. IMG20260531153637.webpIMG20260531161529.webp
Once set to a position the CVs no longer would bind, i raised the car back up with the lift and found out that the limit of the CVs was about standing ride height of the suspension meaning i've got zero downward travel now. It'll have to do till I get the time to shorten the shocks though.
 
Last edited:
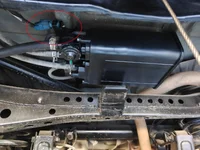
About two months after buying the truck I had multiple evap. emission codes popping up for a small evap leak. P0442, P0441 and a P0456 while on a road trip. Tested every emissions valve, smoked the system, took the charcoal canister out and cleaned out the valves, replaced the VSV solenoid attached to the charcoal canister and gas cap. Code kept coming back though. Watching the flow reading with the charcoal canister air vent clamped off and saw the flow to stop meaning the issue was likely the mechanical vacuum valve that parts of the canister assembly. Unfortunately cleaning the dirt and debris out of it did not fix it so I had to shell out $400 for a new factory canister.

The code requires two drive cycles on a gas tank less then 3/4 or more then 1/4 full for the system to test/set the codes.

The blue body vacuum switching valve(VSV) that is attached to the charcoal canister (circled in red)does fail and IS replaceable without buying a new canister. https://www.amazon.com/dp/B00NFJIIIE?ref_=ppx_hzsearch_conn_dt_b_fed_asin_title_1 OR just get the actual part number off the valve, the replacement is sold as a late model Camry part. The charcoal canister is located above the spare tire.
IMG20260627152254.webp

UPDATE

I got a chance to tear down the valve I suspected was the point of failure. They are removable but as far as I understand they are not replaceable separate from the entire canister but I really wanted to know how the valve worked, failed, and if it was possibly repairable because the tanks are kind of pricey.
IMG20260831140203.webp
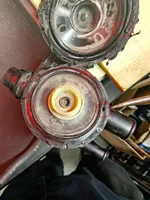
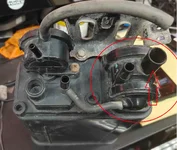
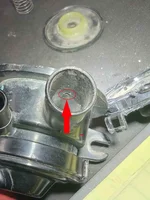
The above picture is the business end of the charcoal canister. I thought the failure was going to be dirt lodged in the valve seal on the circled assembly. The port with the arrow pointing at it is the fresh air vent. During testing clamping off this hose made the flow meter on the smoke machine drop to zero. At rest this valve should be sealed to venting air is my understanding. The end caps of the diaphragms are friction welded on so I had to cut the tops off to see what was going on inside.
IMG20260831143219.webp
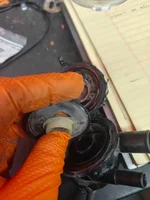
This is the upper section of the diaphragm with the top cut off. The diaphragm apparently tore hence the dust inside the top cap.
Unfortunately there is no repair option as the diaphragm is just worn out and cracking around the center sealing disk. What's interesting is the valve seems counter intuitive in its function if its purpose was to seal off the fresh air vent which is the port in the center on the picture above.
IMG20260831143745.webpIMG20260831143200.webp
However what does make sense is why its registering a very small leak. Inside the fresh air vent port there is a small hole that leads into the top of the diaphragm. The tear in the diaphragm rubber allows evap gasses to pass through into the top of the diaphragm and out the fresh air vent. Sucks it cannot be fixed but at least I now know how it fails and how to properly test it in the future.
 
Last edited:
Last edited:
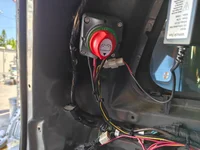
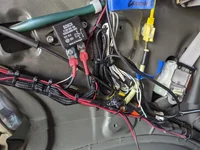
As part of the dual battery setup I added a selector switch on the drivers D pillar that switches the rear power from off/ignition controlled - primary battery/full time power - secondary battery. The switch powers a marine style fuse box in the left rear storage compartment that all the charge ports, diesel heater(future), lights, fans, fridge power, etc are connected to. +1 Beefy relay to supply ignition controlled power.
.IMG20260627122505.webpPXL_20260627_172615034.webpPXL_20260627_172631556.webp
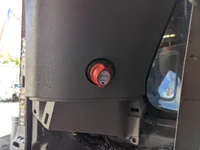
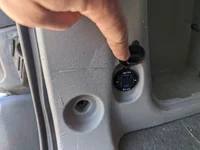
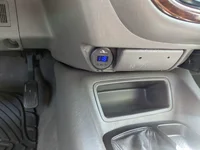
Replaced all the factory light plugs with either USB ports with digital volt meter or marine style lighter plugs. The rear volt meters reflect the selected power source which is convenient when camping. Cheap on amazon and easy to install if you can manage to get the old one out.
PXL_20250726_203837275.webp PXL_20250720_225310740.webp
 
Last edited:
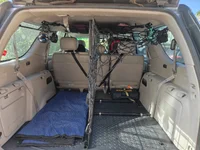
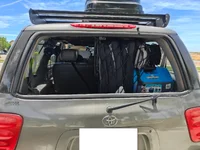
The trucks purpose was comfortable road trips and camping. Before our latest road trip I took a shot at solving the issue of having a dog + lots of luggage in the back. Wire grates welded to an L shape support. Down the center is attached to the seat brackets with U bolts and the right side has hose clamps holding the cross bars all attached to the rear seat brackets. Its easily removable and the lateral bars bolt on so it breaks down for storage. Cargo net over luggage so the dog can still stick his head out of the window while were driving.

IMG20260704181153.webpIMG20260711140931.webp

Link for the rubber mat in the rear. Nothing I've found has complete coverage length wise but this reaches up to the tool kit in the back right of the first photo and is thin enough to trim for access to seat brackets and tie downs.
 
Last edited:
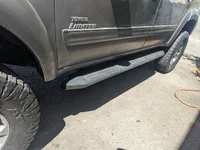
The truck didn't come with running boards when I bought it but the family had trouble getting in and out with how tall the truck is so I grabbed some 200 series LC running boards from the parts pile and modified them to fit. I kind of like the look over the factory running board and they work until I get a chance to build some custom sliders.

PXL_20250703_221508008.webp
 
Want more info on the bumper!
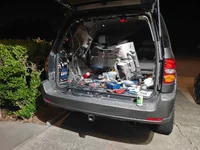
The donner vehicle is still in the shop, I am waiting to see if the owner still wants it after we install the new one but likely they will leave it with us. Will require some modification since it is off an 80 series Land Cruiser as well as I am hoping to keep most of the factory bumper but we will see what transpires. Doing a ton of wiring work in the rear ATM. Will post some more pictures when I'm finished with at least a few of the projects back there.
 
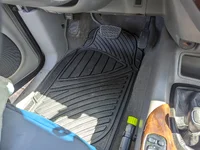
After a road trip I gutted the whole thing. Everything short of the dashboard came out. 250k miles of dirt, leaves, coffee, candy, cokes and god knows what else was all over the floors under the carpet. Scrubbed it every inch of it clean. Machine cleaned the carpet and under padding a dozen times until it looked new. Pulled all the brackets from the ceiling, seats, walls and center console, blasted and painted them. Ran hundreds of feet of wire for future projects.

View attachment 667View attachment 668View attachment 671
Carpet Pre Cleaning
View attachment 669
Carpet Post Cleaning
View attachment 670
Pretty amazing!!!
 

Trending content

Back
Top Bottom